• Home
  • About Me
    • A Simply Raw Life
    • Donuts, Dresses, and Dirt
    • Oh Joy
    • david lebovitz
    • My Life at Playtime
    • Design Mom
    • Curbly
    • AltDesign
    • Peggy Wong
    • A Golden Afternoon
    • Eat, Drink + Be Merry
    • Dylan and Jeni Photography
    • Route 66
    • Cuba A Bittersweet Tale - Part I
    • Cuba A Bittersweet Tale - Part II
    • Cuba A Bittersweet Tale - Part III
    • Cuba A Bittersweet Tale - Part IV
    • Cuba A Bittersweet Tale - Part V
    • Cuba A Bittersweet Tale VI
    • Cuba A Bittersweet Tale - Part VII
    • Cuba A Bittersweet Tale - Part VIII

itsweet & savory itsweet & savory

  • Home
  • About Me
  • Favorites Places
    • A Simply Raw Life
    • Donuts, Dresses, and Dirt
    • Oh Joy
    • david lebovitz
    • My Life at Playtime
    • Design Mom
    • Curbly
    • AltDesign
    • Peggy Wong
    • A Golden Afternoon
    • Eat, Drink + Be Merry
    • Dylan and Jeni Photography
  • Travel Stories
    • Route 66
    • Cuba A Bittersweet Tale - Part I
    • Cuba A Bittersweet Tale - Part II
    • Cuba A Bittersweet Tale - Part III
    • Cuba A Bittersweet Tale - Part IV
    • Cuba A Bittersweet Tale - Part V
    • Cuba A Bittersweet Tale VI
    • Cuba A Bittersweet Tale - Part VII
    • Cuba A Bittersweet Tale - Part VIII

Double Chocolate Hazelnut Biscotti

What to make for dessert when you are having an Italian appetizer party? Biscotti of course. I wanted something simple and not messy that people could walk around with. Although, admittedly biscotti does generate a lot of crumbs, but oh well. I had made biscotti forever ago, but it was a basic recipe, white flour with almonds. This time I wanted chocolate and lots of it. Its funny when I thought about making the biscotti I thought of my friends Dad who also happens to be my neighbor. We've had plenty of meals with their family and I've always seen him dip his biscotti in Prosecco or wine of any kind. So I made sure we had that Prosecco on hand for the party since he and his wife were attending. He did not disappoint. 

Here's how I made them.

Ingredients

2 cups all-purpose flour

1/2 cup unsweetened cocoa powder, I used Valhrona

1 tsp baking soda

1 tsp salt

3/4 stick (6 tablespoons) unsalted butter, softened

1 cup granulated sugar

2 large eggs

1/4 tsp almond extract

1 cup roasted hazelnuts, chopped (I buy raw ones and roast them in a cast iron skillet. After they cool i rub as much of the skin off as I can, but you can leave it on if you'd like)

3/4 cup dark chocolate chips

Preheat oven to 350°F. Butter a cookie sheet.

In a bowl whisk together flour, cocoa powder, baking soda, and salt. In another bowl with an electric mixer beat together butter and sugar and almond extract until light and fluffy. Add eggs and beat until combined. Stir in flour mixture to form a stiff dough. Stir in chopped hazelnuts and dark chocolate chips.

On prepared baking sheet, you might want to flour your hands, form dough into two slightly flattened logs, each 12 inches long and 2 inches wide. I find that longer thinner logs is the way to go, that way when you get to the slicing part you have smaller biscotti cookies, but that's entirely up to you.  Bake logs about 35 minutes, or until slightly firm to the touch. Cool biscotti on baking sheet 5 minutes.

On a cutting board cut biscotti diagonally into 3/4-inch slices. Arrange biscotti on baking sheet and bake until crisp, about 10 minutes. Cool biscotti on a rack. You can keep them in an airtight container for 1 week and frozen, 1 month. I like my biscotti crunching and hard so I baked them slightly longer, no more than a total of 20 minutes.

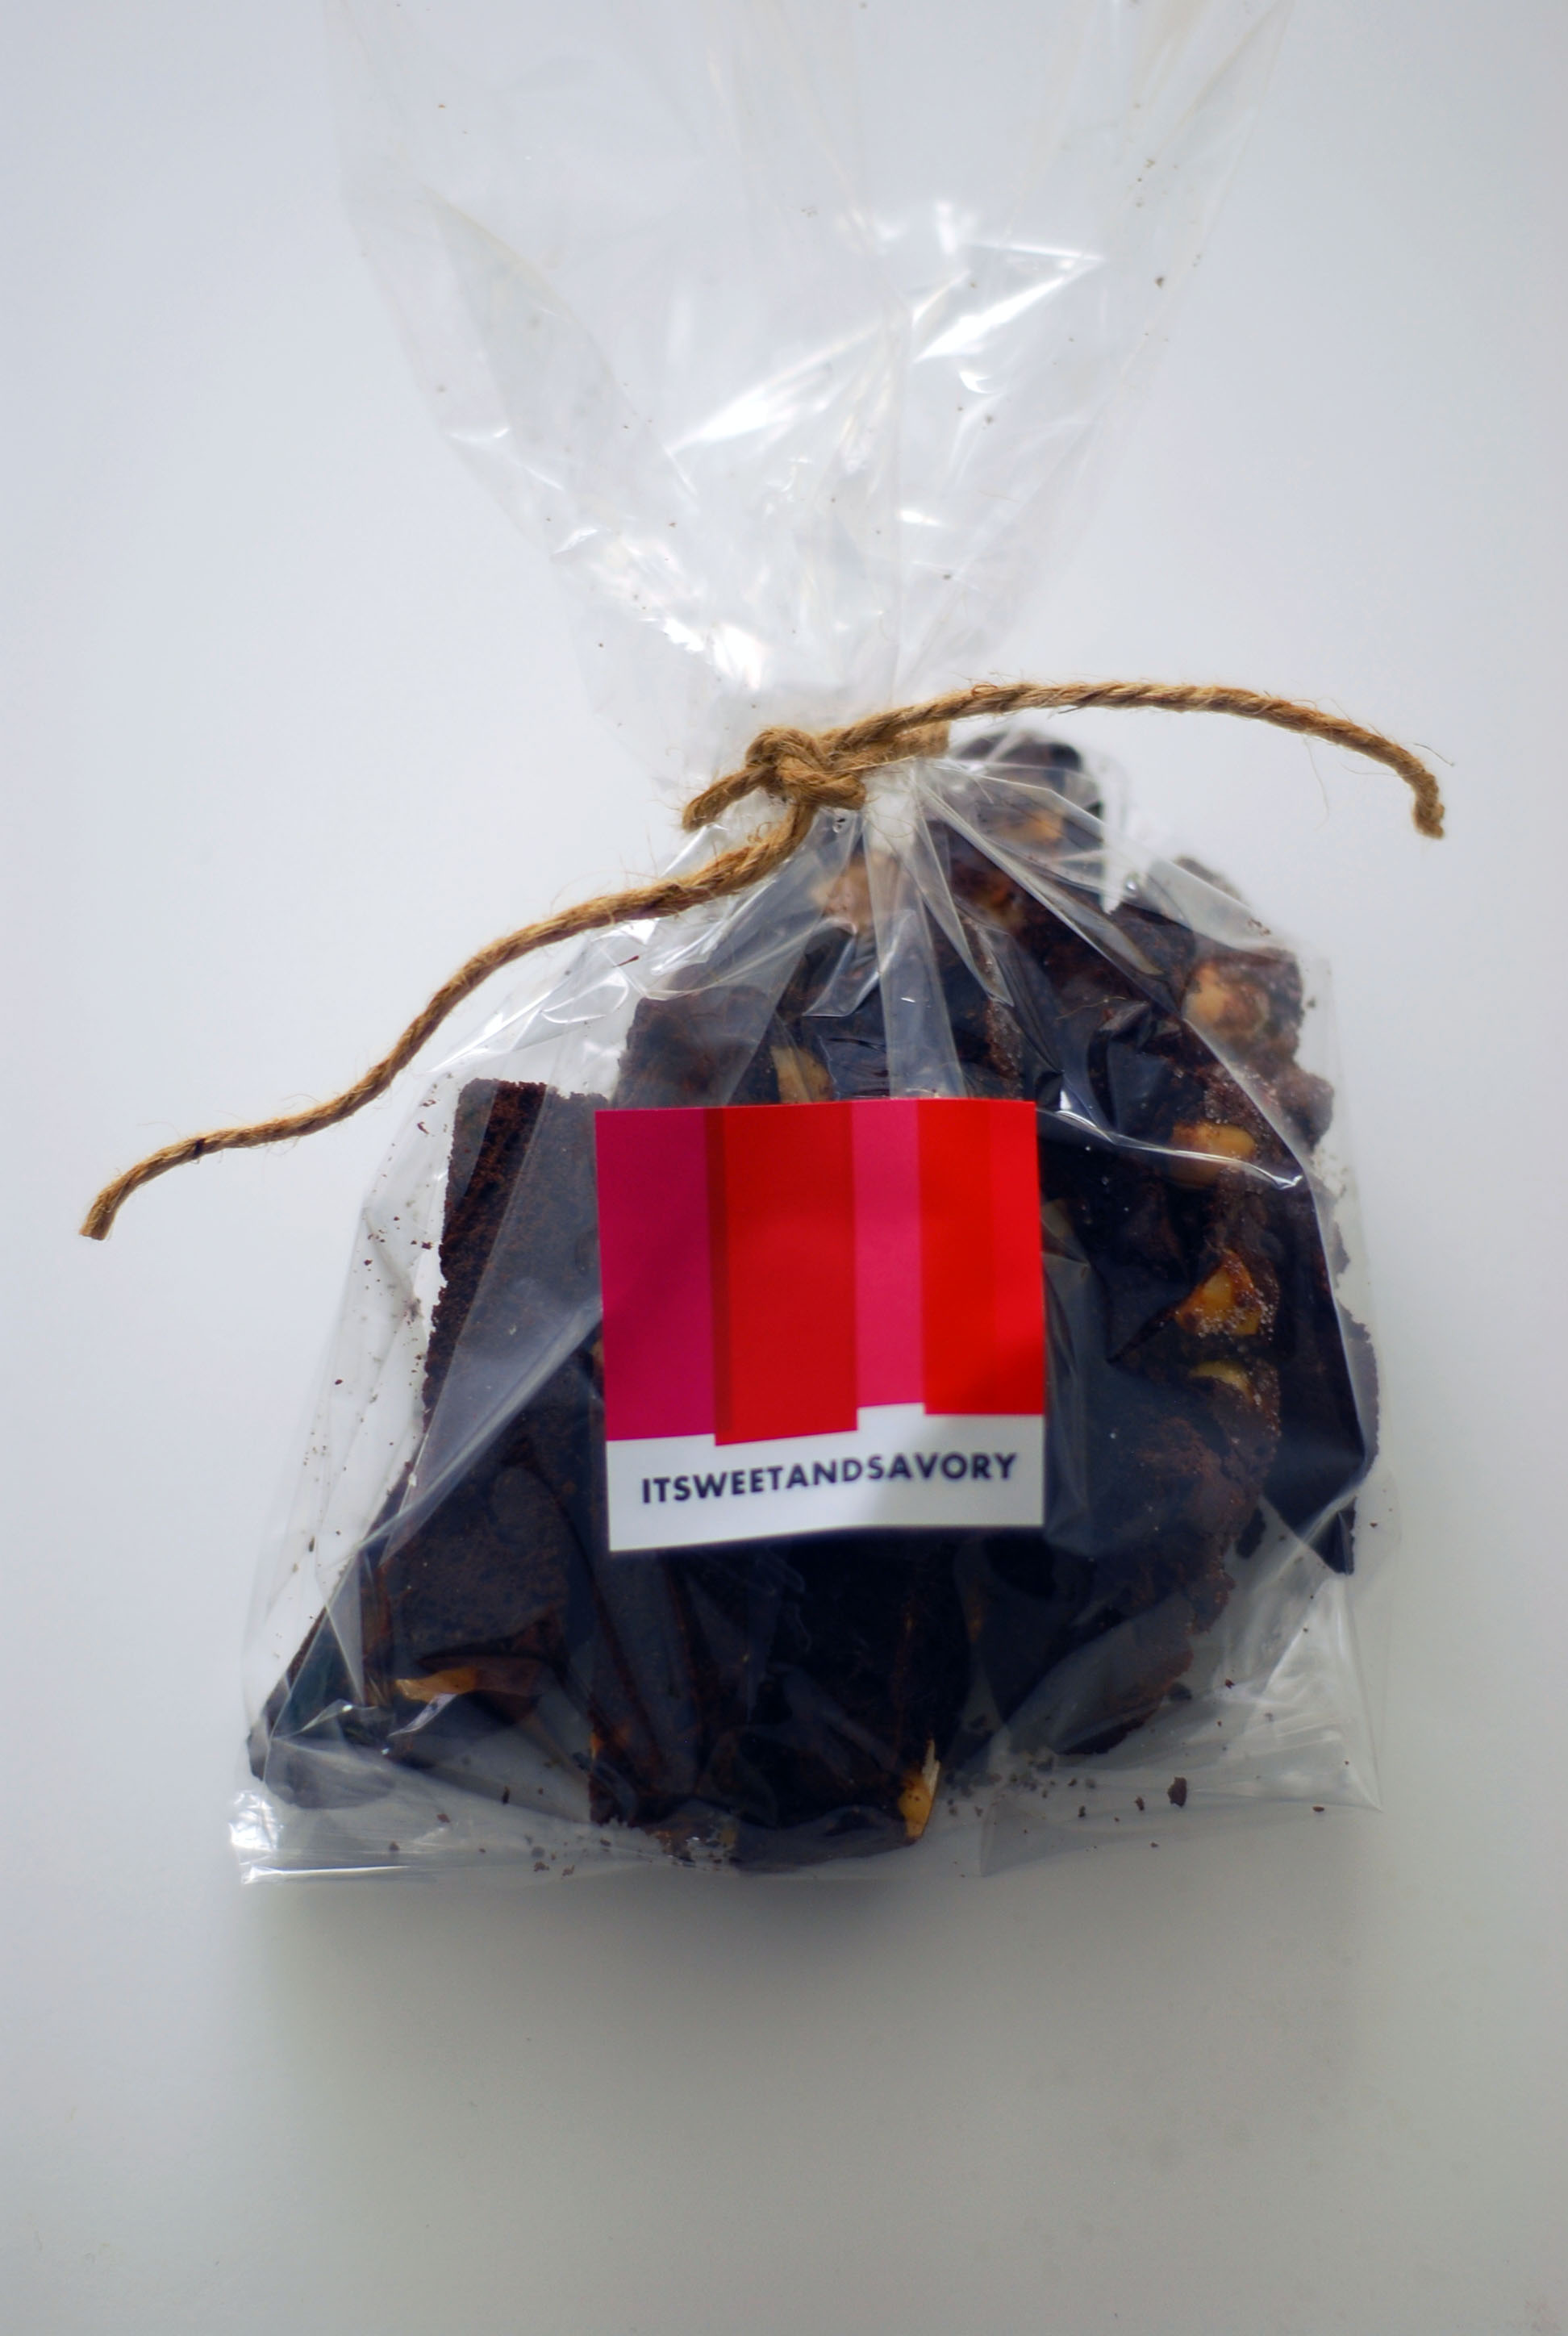
Final task was packaging and sending them on their way. I'm loving these new gift tags from Tiny Prints, which I personalized, actually I'm kind of addicted to them. My friends loved the little packages of goodies and a few friends will get them in the mail with the recipe on my new note pad (seen above) which incidentally looks perfect with the biscotti.

Related Posts Plugin for WordPress, Blogger...

Posted in Bake, Baking, Food, Make, Sweets and tagged with double chocolate hazelnut biscotti, chocolate, chocolate biscotti, chocolate hazelnut biscotti.

May 4, 2014 by Tanya Ponce.
  • May 4, 2014
  • Tanya Ponce
  • double chocolate hazelnut biscotti
  • chocolate
  • chocolate biscotti
  • chocolate hazelnut biscotti
  • Bake
  • Baking
  • Food
  • Make
  • Sweets
  • 4 Comments
4 Comments
BrandyChocolateTruffleswCoconut.jpg

Brandy Infused Chocolate Truffles With Coconut

BrandyChocolateTruffleswCoconut.jpg

That has to be the longest title ever, but there is so much to say about these brandy infused chocolate truffles that I rolled into shredded coconut, OH MY! This recipe is adapted from Alton Browns recipe on Food Network. I made these for my friend Deborah's photo styling project, here, but of course was able to sample a few myself before delivery. Here's the recipe and my notes.

Ingredients

10 ounces bittersweet chocolate, finely chopped

3 tbsp unsalted butter

1/2 cup heavy cream

1 tbsp light corn syrup

1/4 cup of brandy

1/2 cup cocoa powder (Valrohna cocoa powders is what I use to roll the chocolate truffles in)

Shredded Coconut (Trader Joe's brand is what I had on hand to roll the truffles in, but you can use any brand)

BrandyChocolateTruffleswCoconut4.jpg

Directions

Place finely chopped chocolate and butter in a glass mixing blow and mircrowave for 30 seconds. Remove, stir and repeat the process one more time. Set aside.

Heat the cream and corn syrup in a small saucepan over medium heat until simmering. Remove from heat and pour the mixture over the chocolate, let it stand for no more than 2 minutes. Stir gently with a rubber spatula until smooth and creamy. Here's the boozy part, pour the 1/4 cup of brand into the mixture and stir. You can pour the mixture into a square glass backing dish or leave it in the glass bowl and refrigerate for 1 hour.

For rolling out the truffles I'd suggest using a small ice cream scoop. I used and melon baller and it was hard to get the chocolate out of the baller (is that a word, well it is now), so I switched to a small teaspoon and used my warm hands to roll the truffle balls. Next time small ice cream scoop like this one from Target.

BrandyChocolateTruffleswCoconut2.jpg

Once formed you can roll them in the cocoa powder if you want them covered only in that, but I opted for rolling them in shredded coconut. Let me tell you the texture and brandy taste is exciting and surprising. Enjoy!

Related Posts Plugin for WordPress, Blogger...

Posted in Baking, Bake, Food, Sweets and tagged with brandy infused chocolate truffles with coconut, shredded coconut, brandy infused chocolate truffles, truffles, chocolate truffles, chocolate, brandy chocolate.

March 5, 2014 by Tanya Ponce.
  • March 5, 2014
  • Tanya Ponce
  • brandy infused chocolate truffles with coconut
  • shredded coconut
  • brandy infused chocolate truffles
  • truffles
  • chocolate truffles
  • chocolate
  • brandy chocolate
  • Baking
  • Bake
  • Food
  • Sweets
  • Post a comment
Comment
VerticalChPBBars.jpg

Chocolate Peanut Butter Bars

VerticalChPBBars.jpg

So a while back I made these Chocolate Peanut Butter bars for a book swapping party here. Since then I've made them a few more times and am now getting to a place where I'm perfecting the recipe. Plus I had a good excuse this week as I was commissioned to create these for a photo style shoot my friend Deb was doing with VivaVantage paper towels.

Seriously Chocolate AND Peanut Butter, I think this probably goes down as my favorite flavor combo. It's like making sure you have two things that match, makes me think of this quote from the movie Friday when Chris Tucker is looking for something to eat, "No sugar? Y'all ain't never got two things that match. Either y'all got Kool-aid, no sugar. Peanut butter, no jelly. Ham, no burger." And now we can add "peanut butter no chocolate." Accept we have BOTH. Here's the recipe with a few of my notes on what I have found that works best and a note on what I 'll do the next time around. And don't be afraid that it's 3 layers, it's really not that hard to make.

ChocPeanutButterBars_Ingredients.jpg

Chocolate Peanut Butter Bars

Ingredients Bottom Layer

1/2 cup unsalted butter

1/4 cup sugar

5 tbsp unsweetened cocoa (I use Valhrona)

1 egg, beaten

1 1/4 cups graham cracker crumbs

3/4 cup coarsely crush pretzels (I find the thinner salted versions work better than the thick ones - I only had the thick ones for the shoot above, but that's my lesson learned)

Directions

If you have a double boiler use that to melt the butter, sugar and cocoa.  I use a metal bowl over a lightly simmering pot of water (water should not touch the bowl).

While bowl is still over the water, add the beaten egg a little at a time until the mixtures thickens.

Remove bowl from the heat and add the graham cracker crumbs and crushed pretzels. After they are well mixed press the crumbs into a flattened layer an 8x8 cake pan. I use square non-stick baking pan and line it with two pieces of parchment paper crisscross, this makes it easier to get the bars out of the pan for cutting the squares.  Set this aside while you start the middle layer.

Middle Layer Ingredients

1/2 cup unsalted butter, melted and slightly cooled.

2/3 cup powdered sugar, sifting this first is good to get any clumps out.

1 cup smooth, natural peanut butter (no salt added) I like Laura Scudder's.

1/2 tsp salt (only use if you bought unsalted PB, otherwise adjust to taste.

1 tsp vanilla

Directions

Add peanut butter and melted butter together in a small bowl, mix in sugar, salt and vanilla until it forms a thick paste. Now it's time to add the peanut butter over the bottom layer of chocolate pretzel goodness. I have thought about doubling the peanut butter layer as I'd like a bit more thickness, so I might try that next time. Now put all of this in the refrigerator while you make the final Top layer. This way the peanut butter has time to get a little stiff, otherwise it's hard to spread the final chocolate layer on top.

Top Layer Ingredients

5 oz. semi sweet chocolate chips (I love bittersweet or just straight dark chocolate bars for this layer, but use any fine chocolate you like)

1 tbsp unsalted butter

Pink Himalayan salt (or any fine sea salt)

Directions

Again if you have a double boiler use that to melt the chocolate and butter.  I use a metal bowl over a lightly simmering pot of water (water should not touch the bowl). Stir until smooth.

Now take the pan from the refrigerator and pour the chocolate mixture over the peanut butter layer and spread it evenly. Then return to the refrigerator about 10 minutes. (top should be a little soft still). Sprinkle light with the Himalayan salt and return the the fridge and let it completely cool until it becomes hard.

Take out the parchment papered bars and cut into squares or rectangles. I've done both and wrapped them in paper with twine for a special presentation, but it's faster to just cut in and eat it, sooooo good. I have a batch in my fridge now that I keep gnawing at, enjoy this perfect match of flavors.

Itss_ChocPeanutButterBars.jpg
Download Recipe PDF
Related Posts Plugin for WordPress, Blogger...

Posted in Bake, Baking, Food, Sweets, Things, Make and tagged with chocolate peanut butter bars, peanut butter, chocolate, sweets.

February 13, 2014 by Tanya Ponce.
  • February 13, 2014
  • Tanya Ponce
  • chocolate peanut butter bars
  • peanut butter
  • chocolate
  • sweets
  • Bake
  • Baking
  • Food
  • Sweets
  • Things
  • Make
  • 1 Comment
1 Comment
Slice of almond choc gluten-free cake.jpg

Chocolate Gluten-Free Almond Cake

Slice of almond choc gluten-free cake.jpg

As you may already know I've been experimenting with gluten-free baking and my one foray into a vegan recipe, not so good.  In my gluten-free adventures I wanted to make something chocolate, go figure. Since visiting a local health store I've been stocking up on a few different flours. I really like Red Mill's choices. I decided to choose a Oat flour to go along with my Almond meal flour. Coconut flour is on my list to purchase, but it was a bit more expensive. Also, if you haven't already noticed, I almost always use some sort of bittersweet chocolate. I like the richness of it and can control the sugar myself. I am not a milk or white chocolate fan. Occasionally I use semi-sweet. I stock up on this around holiday times, since everyone bakes and bittersweet chocolate chips go on sale, mostly use Ghiradelli, but Trader Joes has a BIG bittersweet chocolate bar option.

Here's a cautionary note of WHAT NOT TO DO if your using a double broiler method to melt the chocolate and butter: #1 chop up the chocolate before putting it in the glass bowl with the butter and #2 NEVER use a knife in the bowl, while it's over the simmering water, that = exploding glass bowl. Yes I did this, and am fortunate enough to be spared glass in my eyes, or on my face, or taking out my jugular. Just a few shards of glass on my arm and ankle, with minor bleeding. Great way to start the day. An hour later, after I cleaned up both me and the kitchen, I started the recipe all over again, since there were shards of glass in my mixtures and pans, etc...

Despite my miss-adventures this recipe was a hit, and as usual I experimented on my friends who loved it too. 

Chocolate Gluten-free Almond Cake Recipe 

6 ounces bittersweet chocolate CHOPPED

1/2 cup unsalted butter, cubed

4 large eggs, separate the yolks from the whites and keep both

1/2 cup granulated sugar (half the sugar will go with the egg yolks and the other half with the egg whites)

1/3 cup plain whole-milk yogurt (I used non-fat Australian vanilla bean yogurt, because that is what I had on hand)

1 teaspoon vanilla extract

1/2 teaspoon salt

3/4 cup almond flour (you can use hazelnut flour as an alternative)

1/4 cup oat flour (you can use buckwheat flour as an alternative)

Almond Slivers

Preheat the oven to 350ºF.

Butter an 8-inch round cake pan and line the bottom with parchment paper.

In a large, heatproof bowl set over a pan of simmering water, don't let the bowl touch the water (SEE MY NOTE ABOVE FOR WHAT NOT TO DO). Melt the chocolate and butter until smooth, then remove from the heat and let cool slightly. You can also quickly melt this in the microwave.

In a medium bowl, whisk together the egg yolks, half of the sugar, yogurt, vanilla, and salt, then whisk them into the melted chocolate. Stir in the almond flour, and the oat flour.

In another bowl of a stand mixer, or hand mixer, whip the egg whites until they form soft peaks. Gradually whip in the other half of the sugar until the whites form firm peaks. Fold 1/3 of the whipped egg whites into the chocolate mixture to lighten it, then fold in the remaining chocolate mixture just until it’s completely combined.

Pour the batter into the pan, level the top and then sprinkle a generous amount of Almond slices over the top, the more the merrier. This gives it a beautiful finished look and adds in extra crunch.

Chocolate gluten-free almond cake.jpg
Wide View Chocoalte gluten-free almond cake.jpg

Bake for 25 to 30 minutes; cake should be set and the center slightly soft.

Let it cool for 10 minutes, then remove from the cake pan and serve.

Slice Chocolate Gluten-free almond cake 2.jpg

Enjoy! 

Related Posts Plugin for WordPress, Blogger...

Posted in Bake, Baking, Food, Make, Sweets and tagged with gluten-free, almond, chocolate, almond flour, oat flour.

September 19, 2013 by Tanya Ponce.
  • September 19, 2013
  • Tanya Ponce
  • gluten-free
  • almond
  • chocolate
  • almond flour
  • oat flour
  • Bake
  • Baking
  • Food
  • Make
  • Sweets
  • Post a comment
Comment
Chocolate Creme Fraiche Tart.jpg

Chocolate Creme Fraiche Tart

Chocolate Creme Fraiche Tart.jpg

I know I teased you all this week on Instagram, but I wasn't really trying.  I just took all my pictures of the above Chocolate tart for the blog and promptly sat down and ate it when I was done. Then I looked over at my fabulous plate from England and saw I had practically licked it clean. So here today is my Chocolate Creme Fraiche Tart. I know rich right and yes RIGHT and so good.  

I know you all go buy the Creme Fraiche at Trader Joes, I cannot be the only one. I use this stuff for everything. Mixed with Tapatio for quesadillas, or chicken taquitos. Mixed with sugar and lemon zest for french toast and whatever else I can come up with. This time when I took the package off I noticed there were recipes on the back. So I thought, I'm having dinner with my friend, she loves chocolate, I love Creme Fraiche. It's a match made in my kitchen. 

Chocolate Creme Fraiche Tart

1/2 cup milk (I used whole milk, cause why not) 

7 oz chopped bittersweet chocolate (I used Ghiradelli) 

1 large egg yolk

7/12 ounces of Creme Fraiche

9 inch tart pastry (I made my own, recipe found below, but you can use a pre-baked pastry shell if that's easier for you) 

Preheat the oven to 325.

Lightly whip egg yolk with the Creme Fraiche and set aside. Bring milk to a boil, stir continuously. Turn off heat and add chocolate to milk. Stir until chocolate is completely melted. Slowly add egg and Creme Fraiche mixture to the chocolate mixture and stir thoroughly. 

Place the pastry into a 9 inch tar pan and pour in the chocolate Creme Fraiche mixture. Bake for 25 minutes. Remove tart from oven and cool to room temperature. Chill in refrigerator for at last one hour before serving. Serves 8.

Tart Pastry

1 1/4 cups (6 1/2 oz/ 200g) cups all purpose flour

1 tbsp sugar

1/4 teaspoon salt

1/2 cup (4 oz/125 g)  unsalted butter, chilled

2 tbsp, or more, cold water

I used a food processor, but you can do this by hand using a pastry blender. 

Place the flour, sugar and salt in the processor. Cut the butter into small pices and add them. Process using rapid pulses until mixture resembles small crumbs or flakes. Add 1 tbsp of water and process a couple of seconds. Add additional tbsps of water untill it is damp enough to form a rough mass. 

Dump the dough onto a piece of clear plastic wrap and form into a cake. I wrapped mine up and let it sit in the refrigerator to cool for 30 minutes. After that pull it out, roll it to a nice round circle and form it into your tart pan. I like to use removable bottom steel tart pans, but use what your used to.

Chocolate Creme Fraiche Tart.jpg

I enjoyed this tart with a cup of coffee in the morning and well a cup of tea in the afternoon. Whatever works for you it was delicious the next day. 


Related Posts Plugin for WordPress, Blogger...

Posted in Bake, Baking, Food and tagged with chocolate, chocolate tart, chocolate creme fraiche tart, tart, creme fraiche, dessert, sweet.

September 14, 2013 by Tanya Ponce.
  • September 14, 2013
  • Tanya Ponce
  • chocolate
  • chocolate tart
  • chocolate creme fraiche tart
  • tart
  • creme fraiche
  • dessert
  • sweet
  • Bake
  • Baking
  • Food
  • 2 Comments
2 Comments
ChocBark Finale.jpg

Chocolate Bark

ChocBark Finale.jpg

I'm in the process of creating all kinds of treats and decor for an upcoming event. Most anything special involves chocolate for me. Once during the hottest day of summer I decided to make my own chocolate truffles, what a mess, they were delicious, but my white kitchen had chocolate in places I didn't think were possible.  The weather is still nice here in L.A. so I think I'm safe to try my hand at this chocolate creation.

A reader once asked me whether I tempered my chocolate while making one of my recipes. I never have done this and wasn't sure why I needed to. So I went to doing my research on why and how. The best explanation and easiest recipe was found here, David Lebovitz is the blogosphere master of chocolate in my humble opinion.

Follow his recipe and use a proper thermometer, David suggest this one at Amazon, Chocolate Tempering Thermometer, ​if only I had this, it would have been much easier. But I made due with the one I had and well eyeballed it and tasted along the way. So far the chocolate has held up.

ChocBark chips.jpg

Use dark chocolate bittersweet chips no more than 70% cacao is suggested.  I bought these at Surfas, in Culver City, California. But you can find decent chocolate in your local grocery store.

ChocBark melted.jpg

Melting and temperature checking. So hard not to take spoonfuls of this along the way. That is so not the right thermometer, try the one that David recommended on the link above.

ChocBark fixings.jpg

​Here are the ingredients for my chocolate bark. I did a few batches of chocolate. One where I stirred in a tablespoon of instant espresso coffee and then added in the toasted almonds and a few dried cherries.  Of course I used my candied orange peels and pistachio for another version and finally added in apricots, cherries and almonds for a final version. Use whatever ingredients you like, pick your favorites I like to make sure to add some color so I tried to use a variety.

ChocBark layout.jpg

Here's where you get to smear the chocolate. I used a small 1/4 cooked sheet with parchment paper on the bottom. I smeared the chocolate out and started laying in my fixings, you need to work quickly before the chocolate starts to harden. Candied orange peels and pistachios for this batch.​

ChocBark finished1.jpg
ChocBark finished2.jpg

Let it cool in the refrigerator for about 15 minutes and then it's ready for breaking into pieces and eating right away, in my case i saved these for an event and will package them up the day before.

ChocBark plate.jpg

Voila, all done, delicious and beautiful. I can't wait to share these with my friends. Enjoy!

Related Posts Plugin for WordPress, Blogger...

Posted in Baking, Bake, Food, Make, Sweets and tagged with chocolate, sweets, chocolate bark.

March 27, 2013 by Tanya Ponce.
  • March 27, 2013
  • Tanya Ponce
  • chocolate
  • sweets
  • chocolate bark
  • Baking
  • Bake
  • Food
  • Make
  • Sweets
  • Post a comment
Comment

Chocolate Mousse with Orange Mascarpone Whipped Cream

So last night was the Oscars. One of my favorite shows to watch since I was a little girl. Life though has been so busy and for various reasons I literally only saw one of the movies that had a nomination. But tradition is that I must watch this show. So we had two friends over, the kind of friends that you don't have to dress up for, that can cook in your kitchen and find your silverware drawer and eat your Pretzel Bites and your okay with that (well maybe, Pretzel Bites are almost sacred in our household). With that said I quickly took inventory of what I had at home and made a run to Trader Joes for all the fun foods, salami, sopresseta, provolone, goat and asiago cheese, shrimp, cocktail sauce, and smoked salmon.

As everything was pretty much just layout on a plate I decided to make one thing from scratch. So having just watched an episode of Giada's

Italian Kitchen

on the Food Network I thought I'd make this Bittersweet Chocolate Mousse with an Orange Mascarpone Whipped Cream. Truly this was a treat. The mousse was rich and decadent, super creamy, and the orange mascarpone whipped cream was cool and refreshing. Chocolate and Orange are a super combination, they always seem to enhance the flavor in each other. My friend literally said, "Wow," through every bite she took.

Here's the recipe I followed from

FoodTV.com

:

Mousse:

1/2 cup whole milk

3 tablespoons sugar

1/4 teaspoon instant espresso powder

1 cup bittersweet chocolate chips

3 large egg whites

Cream:

1/4 cup mascarpone cheese, room temperature

2 tablespoons fresh squeezed orange juice

1/2 cup whipping cream

2 tablespoons powdered sugar

1 teaspoon orange zest

For the Mousse: In a small saucepan over medium heat stir together the milk with the sugar and the espresso powder until the milk is hot, but not boiling, and the sugar is dissolved. Place the chocolate chips in a blender.

*Pour the hot milk over the chips. Run the blender on high until combined, a few seconds. Add the egg whites and run the blender on high until light, about 1 minute. Transfer the mousse to 4 small serving cups. Cover with plastic wrap and place in the refrigerator until firm, about 3 hours.

For the Cream: In the bowl of an electric mixer, stir together the

mascarpone cheese and the orange juice until smooth. Add the cream,

powdered sugar, and orange zest. Whip until the cream has soft peaks, about 1 minute. Whip the cream just before serving the mousse or cover with plastic wrap and place in the refrigerator until ready to serve.

* When blending hot liquids: Remove liquid from the heat and allow to cool for at least 5 minutes. Transfer liquid to a blender or food processor and fill it no more than halfway. If using a blender, release one corner of the lid. This prevents the vacuum effect that creates heat explosions. Place a towel over the top of the machine, pulse a few times then process on high speed until smooth.

Related Posts Plugin for WordPress, Blogger...

Posted in Baking, Bake, Food, Sweets and tagged with chocolate mousse, mousse, chocolate, orange, orange mascarpone.

February 25, 2008 by Tanya Ponce.
  • February 25, 2008
  • Tanya Ponce
  • chocolate mousse
  • mousse
  • chocolate
  • orange
  • orange mascarpone
  • Baking
  • Bake
  • Food
  • Sweets
  • Post a comment
Comment

itsweet & savory itsweet & savory

Food+Travel+Life

Lifestyle blogger who loves coffee, architecture, local cultural interests, good food and travel stories.

  • Home
  • About Me
    • A Simply Raw Life
    • Donuts, Dresses, and Dirt
    • Oh Joy
    • david lebovitz
    • My Life at Playtime
    • Design Mom
    • Curbly
    • AltDesign
    • Peggy Wong
    • A Golden Afternoon
    • Eat, Drink + Be Merry
    • Dylan and Jeni Photography
    • Route 66
    • Cuba A Bittersweet Tale - Part I
    • Cuba A Bittersweet Tale - Part II
    • Cuba A Bittersweet Tale - Part III
    • Cuba A Bittersweet Tale - Part IV
    • Cuba A Bittersweet Tale - Part V
    • Cuba A Bittersweet Tale VI
    • Cuba A Bittersweet Tale - Part VII
    • Cuba A Bittersweet Tale - Part VIII
Mom It Forward: Contributor
Follow on Bloglovin
  • Bake
  • Baking
  • Coffee
  • Cuba
  • Food
  • LA Local
  • Life
  • Make
  • NY Local
  • Play
  • read
  • Sweets
  • Things
  • Travel
  • US City
NYSE for SMPW. Did you get that. New location for us, was a lovely day. Nice to be back down here doing our volunteer work. Always fulfulling.
This was my pre-meal to get me fed and courage to go network with people I don’t know but want to know. Finally got to @barpisellino for their classic Negroni. Did not disappoint.
Quick trip down to the city tonight to Network. So out of practice but was good to make some work connections. Chrysler Building and Grand Central Station pics never get old.
When the light hits your new coffee mug just perfectly. Pottery by @lark_potters
NYSE for SMPW. Did you get that. New location for us, was a lovely day. Nice to be back down here doing our volunteer work. Always fulfulling. This was my pre-meal to get me fed and courage to go network with people I don’t know but want to know. Finally got to @barpisellino for their classic Negroni. Did not disappoint. Quick trip down to the city tonight to Network. So out of practice but was good to make some work connections. Chrysler Building and Grand Central Station pics never get old. When the light hits your new coffee mug just perfectly. Pottery by @lark_potters
twitter
pinterest
facebook

Powered by Squarespace. Content is for demonstration purposes only.